Method
|
|
Materials:
I used a jug on the end of a pole to collect water in without contaminating it. Gloves can also be used for this reason when collecting the water with your hands. An electronic pH meter is also a good idea so that the water can be tested on site and not back at the lab. Litmus paper could also work for this. A test kit is also needed, something that can test for carbon dioxide, dissolved oxygen, chloride, and ammonia. For this experiment, Hach’s Fish Farming Water Quality Test Kit was used. Containers are needed as well to collect the samples of pond water to do the testing. For this, ten 50 mL vials were used as well as assorted jars to help collect specimens.
Methods:
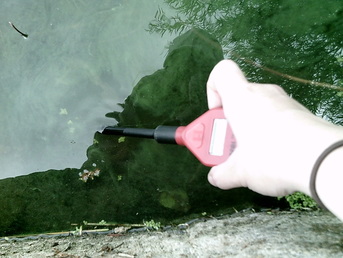
To start the project, water was collected from five different sites and the pH was tested at twelve different sites. Each of the sites was numbered to show exactly where they are. I had collected water from sites 1, 2, 4, 10, and 12 for testing. These were all important sites such as the lead in, the lead out, the pond, the stream between the lake and the pond, and opposite sides of the lake. To collect the water, I put on gloves and submerged a 50 mL vial is full and then cap it while it is still submerged. This prevents contamination with the atmospheric oxygen. The other option is to collect water using a bottle attached to the end of a pole when the water is out of reach. The vial was then filled up to the fullest point possible. Each time water was collected, I filled two vials so there is enough water to do a complete test on. This means that for each site I chose to test on, 100 mL of sample, or two vials, were filled up.
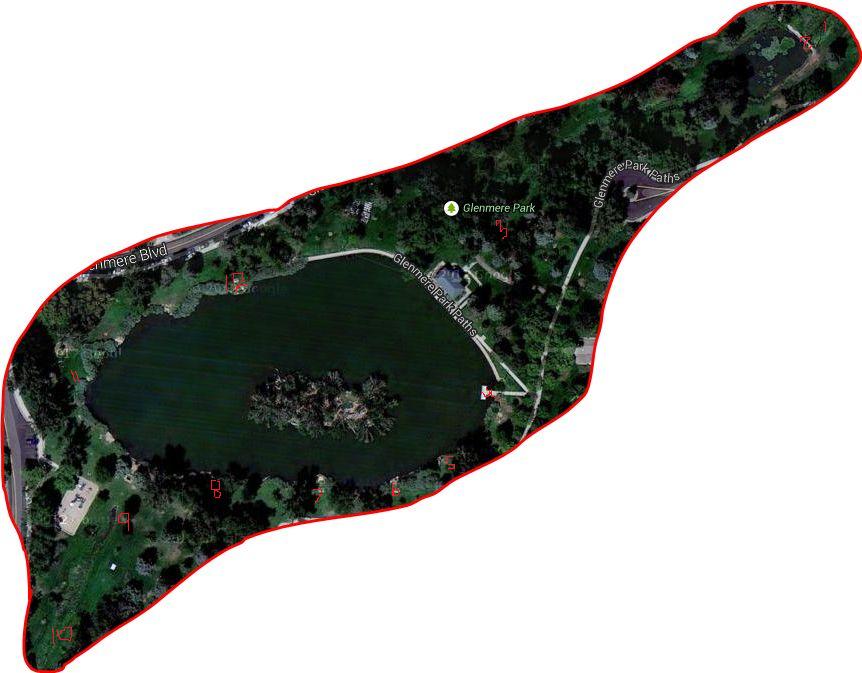
Below is Figure 1: A satellite map taken from google maps to show where the sites are, labeled with red numbers.
I used a jug on the end of a pole to collect water in without contaminating it. Gloves can also be used for this reason when collecting the water with your hands. An electronic pH meter is also a good idea so that the water can be tested on site and not back at the lab. Litmus paper could also work for this. A test kit is also needed, something that can test for carbon dioxide, dissolved oxygen, chloride, and ammonia. For this experiment, Hach’s Fish Farming Water Quality Test Kit was used. Containers are needed as well to collect the samples of pond water to do the testing. For this, ten 50 mL vials were used as well as assorted jars to help collect specimens.
Methods:
To start the project, water was collected from five different sites and the pH was tested at twelve different sites. Each of the sites was numbered to show exactly where they are. I had collected water from sites 1, 2, 4, 10, and 12 for testing. These were all important sites such as the lead in, the lead out, the pond, the stream between the lake and the pond, and opposite sides of the lake. To collect the water, I put on gloves and submerged a 50 mL vial is full and then cap it while it is still submerged. This prevents contamination with the atmospheric oxygen. The other option is to collect water using a bottle attached to the end of a pole when the water is out of reach. The vial was then filled up to the fullest point possible. Each time water was collected, I filled two vials so there is enough water to do a complete test on. This means that for each site I chose to test on, 100 mL of sample, or two vials, were filled up.
Below is Figure 1: A satellite map taken from google maps to show where the sites are, labeled with red numbers.
The first test that is done is a carbon dioxide test, which is done with a phenolphthalein indicator and adding a sodium hydroxide standard 0.01 N solution until the solution turned a light pink. Each of the drops was about the same volume, or to the best of my ability. The number of drops that was added multiplied by five is the amount of carbon dioxide in milligrams per liter.
The next test was for chloride content.This is a test to see how much salt is actually in the water, which determines what kind of fish can survive. The chloride test is done by adding the chloride 2 indicator powder, which is just pure chloride ions, to 20 mL of sample water. Then silver nitrate solution is added until the solution turns a reddish brown. The number of drops of silver nitrate that was added multiplied by thirty is the chloride content in milligrams per liter.
The last test that is able to be done with these samples is the ammonia test. One drop of Rochelle salt solution is added to 5 mL of the sample and then 3 drops of the Nessler reagent is added. Then it is swirled and was left standing for ten minutes. At the same time, the same procedure is done to 5 mL of deionized water and it is also left sitting. It is then put into the Color Comparator, which is a device that has a color wheel inside that will compare the control, in this case the deionized water, and the sample. When the colors match, a scale can be read on the bottom that will show what the concentration is. In the ammonia test, this number on the scale was the amount of nitrogen in milligrams per liter. To find the amount of toxic ammonia, the amount of nitrogen in milligrams per liter was multiplied by a number found in a table that comes with the test kit that compares the pH and the temperature of the water. The product of those two numbers was then divided by one hundred and finally multiplied by 1.2. The final result was the amount of toxic ammonia in the water in milligrams per liter.
The last test can only be done with a special container to prevent atmospheric oxygen contamination. The sample must be taken by submerging the bottle and capping it while it was underwater. Dissolved Oxygen 1 and 2 reagent powders were then added to this vial and shaken. The solution then must settle until the precipitant is settled half way down and then shaken again. After, the dissolved oxygen 3 powder was added and shaken again. 20 mL of the solution is then removed and sodium thiosulfate standard solution is added one drop at a time until the color changes from yellow to clear. The number of drops was the amount of oxygen in milligrams per liter in the water.
Nitrites were also tested for initially, but after several days of testing as well as talking to the park manager, it was determined that there was no nitrites at all in any of the water in the park.
